How do you make an effective sample and why is it essential to do so?
Why make a sample?
To get exactly the dimensions you want!
For a knitted jumper or sweatshirt, socks, a toque or any project that requires some adjustment.
Steps to make a sample:
- Follow exactly what the pattern requires in the sample description.
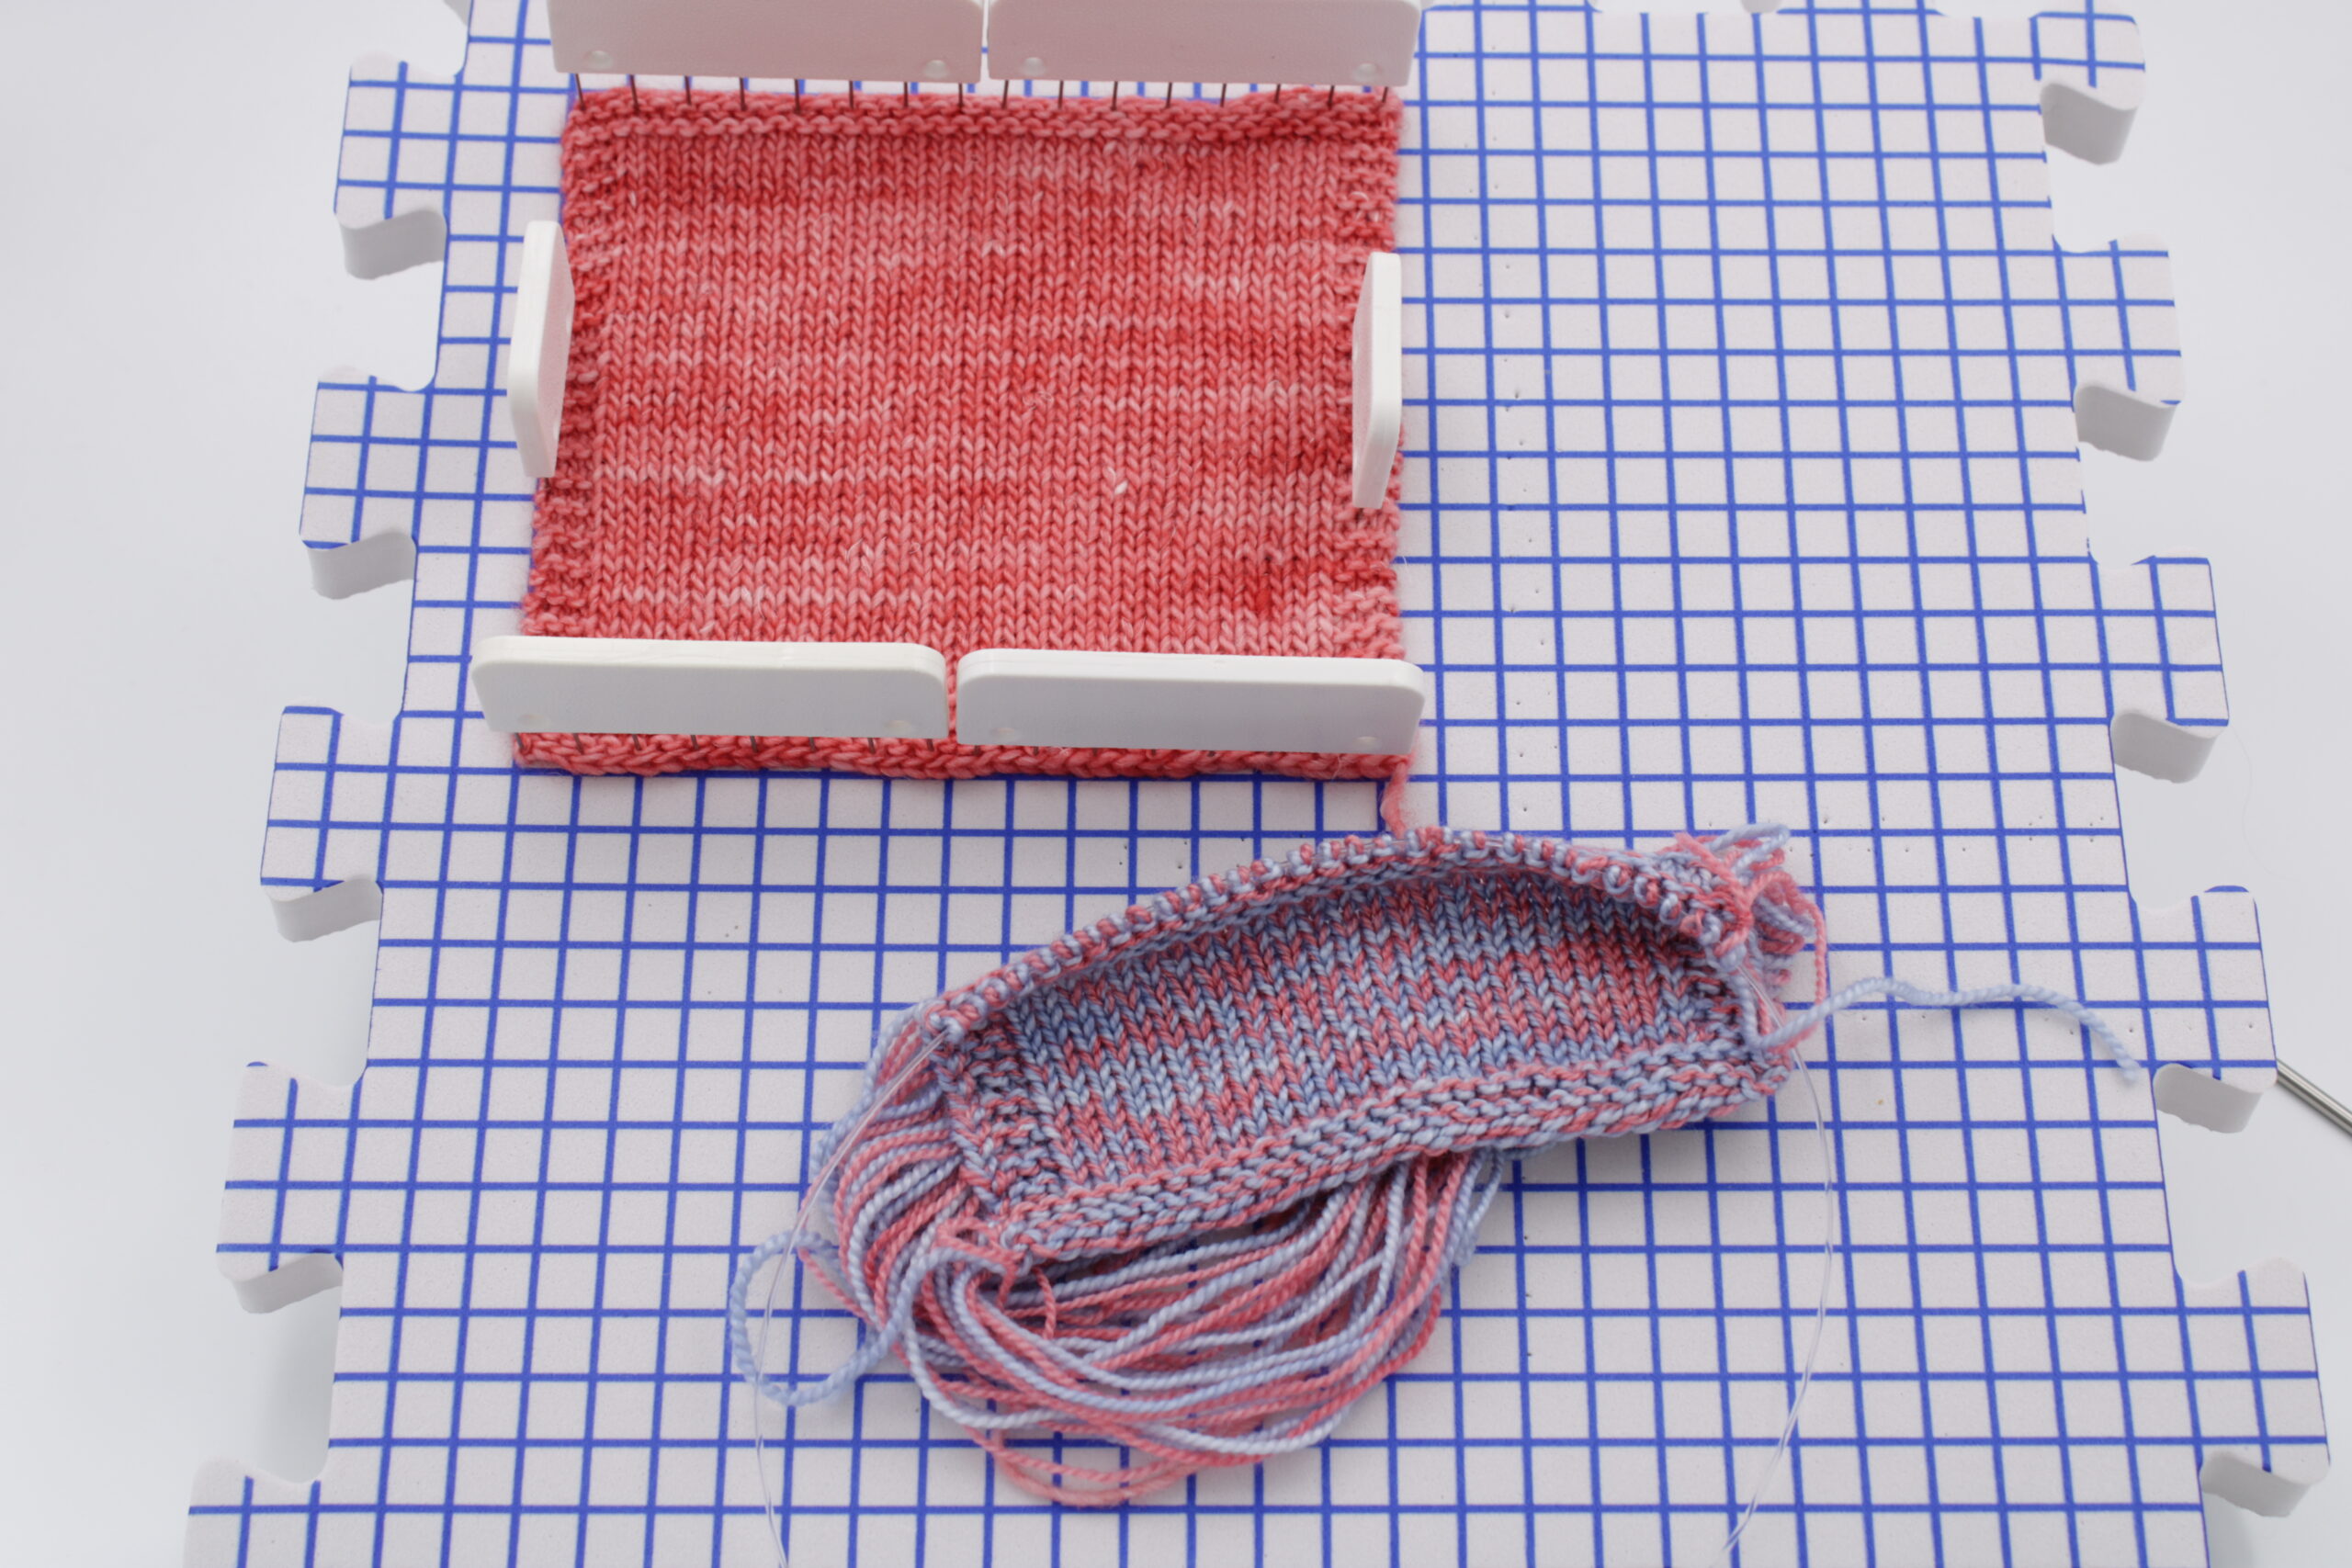
- Make the sample like the knitted project (flat or round).
- Measure the dry sample, e.g. 21 stitches (widthwise) x 31 rows (heightwise).
- Soak the sample.
- Block the sample.
- Dry and repeat the measurements in width (number of stitches) and height (number of rows).
- Repeat the sample if necessary.
Choosing a pattern
For example, if you want to a wool jumper (example of pattern: Trescao (jumper) by Along with Annayou will need to download it and read the the complete card.
What the pattern sheet says about the sample
- Measurement: chest size of the finished garment.(1*) 80, 85 (90, 95, 100, 105110) [115, 120, 125, 130, 135] 140, 150, 158 cm (in my example I select the 6th choice, see above underlined)
- Ease: Dimension more than the actual measurement. I recommend a positive ease varying(2*) between 3 and 10 cm, depending on your taste.
- Sample: 21 sts x 31 rows = 10 cm round jersey with 4 mm/US 6 needles (or other size, depending on your sample)
- Wool: DK wool(3*) - about 600, 670 (700, 760, 800, 830, 880) [915, 1055, 1150, 1250, 1350] 1450, 1550, 1660 metres] (always the 6th choice, as this is the size I want in my example)
How to make an effective sample with a knitting pattern?
Select thedesired measurement.
(1*seeMeasurement) To get the desired size, I recommend taking the measurement under the armpit, just at the beginning of the chest and choose the desired (2*)ease. For example, my chest size is 38 inches or 96.52 cm. I want 3 inches or 8 cm of ease, so 41 inches or 104.52 cm of dimension.
I will choose the 6th measurement size which is 105(1*). Note that this is the 6th size in this pattern - so anything to do with size, amount of wool etc. will also be the 6th choice.
Choose the wool.
Here, in the example, the pattern calls for a DK yarn size. Make sure you have the required amount of yarn(3*) for the desired size. Then start your sample in the round with 4 mm needles.
Mounting the required meshes
Make a minimum of 21 stitches + 6 stitches = 27 stitches. However, I suggest making the sample with 39 to 41 stitches, as the larger your sample, the more realistic it will be.
To follow up the previous example, I therefore put on 41 stitches (20 stitches more than the 21 stitches required for the sample).
I will start with 3 rows of moss stitch.

On thefirst row (which happens to be the first row after the 3 rows of moss stitch in my sample), my first 3 stitches will be purl, the next 35 on the right side and the last 3 stitches will be purl.
On the2nd row, the 41 stitches will be on the right side. I alternate the row (1 and 2) for a minimum total of 31 rows.
Then do three more rows of moss stitch and fold the stitches over loosely.
Measure the sample.
Measure your sample dry (before soaking). Calculate 10 stitches, place a marker, calculate 21 stitches and place another marker. Then measure between the 2 markers and write down the measurement for 21 stitches (for example, 9.5 cm). Measure your height for 31 rows (in the example here, the stockinette stitch which is between the beginning and end rows of the moss stitch).

Soak your sample for 15 and 20 minutes and blot it in a towel to remove as much water as possible. Afterwards, block your sample as you would when blocking your project.
For a jumper, I usually lay my sample and project on my blocking mat and spread it out. I place it so that it is straight without stretching the sample or project and secure it with blocking combs or pins in a few places to shape it well.
When the sample is dry, go back to the same place, i.e. put the markers back on so that you can measure the 21 stitches in the centre of the sample for the number of stitches and the height between the strips of foam stitch. If you get 21 stitches for 10 cm, you can start your project.
However, if the 21 stitches measure 9.75 cm, for example, when the project is finished the circumference will be 102.14 cm rather than 105 cm. Therefore, you need to make a new sample with larger needles (4.5 or 5 mm) to get the measurement of 21 stitches per 10 cm.
However, if the measurement is 10.5 cm rather than 10 cm after blocking, the circumference will be 110 cm instead of 105 cm. The sample will therefore have to be redone with smaller needles (3.5 or 3.75 mm to obtain 21 stitches per 10 cm).
The consequences of not making a good sample
If you don't get an accurate sample, the jumper will not be the right size. It will be too small or too big. How did I do the calculation? Here's a trick to get the size of the circumference of the project (jumper): after the sleeves are separated, the pattern usually indicates how many stitches we need to have on our needles to make the body. Go to the pattern sheet to validate the number of stitches on the needles after the sleeve separation. In the same example, for the 6e size, you will have 220 stitches. Use the rule of 3 to calculate the size of the body.
- Sample: 21 meshes = 10 cm (so 220 meshes = 105* cm for the 6th size). 220 meshes = +/- 105 cm
The rule of 3: the calculation is 220 x 10 divided by 21 equals the circumference.
Note that for a shawl, for example, the sample might not be made. This is, in my opinion, the only kind of project where the sample is not essential.
Now you understand how and why to make your sample! All you have to do is start it. Enjoy your knitting and have fun!
Read more in the next article: How Ravelry works!